Updating an older home can be a challenge with costs going up on materials and time constraints. However, older homes have a unique charm to them that is just not found in all homes. Not that new homes built to order are not fabulous. It is the costs of such homes and the current interest rates on such. Those two issues are allowing homeowners to update their older homes to the new trends instead. One of the big trends right now is bringing nature in and that is something I want to incorporate in some of my projects.
Real Wood treads
Wood tones are a fantastic way to bring nature into your home. People are bringing in the most natural wood art (twisted wood decor, candle sticks), more realistic faux trees, wood vases, and more. All in beautiful natural tones. I want more of that as well, but cost-effectively.
Examples of some popular items in beautiful real wood

Wood Awning Window
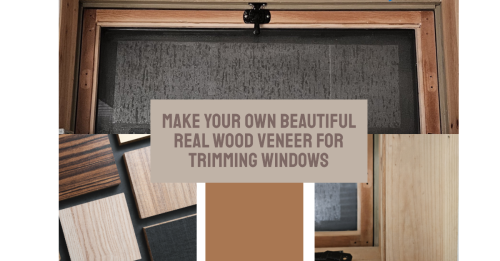
I wanted to show a picture from West Elm with some beautiful wood tones. You can see what I mean by the wood tones now in decorating. The 2nd photo is a similar type of window in my opinion, to the one that I am wrapping in beautiful real wood veneer for trimming windows
Windows
As you can see, I have tiny windows in the basement of this home. I did not like the white trim work. The white trim work was not great. It was one of the first projects I did in this home. Home projects were a new thing to me. Although, I don’t discourage anyone from doing it. How do you learn how to do it?
However, just updating to new windows was not going to make them look that much better in my opinion. As well as the windows may need to be a special order. Not a route I wanted to go. To make it look better, I would need to cut concrete and add bigger windows. Not in my budget at this point. Another point is replacing windows in the basement is not one of the items that you recoup your money from typically.
Beautiful real wood veneer for trimming windows
Anyway, as you may remember from my board and batten project. There was a small portion of the 1 X 3 (s) cut off to make the wood less protruding from the wall. ( In other words, the largest width of the boards was trimmed off of the boards). Trimming the boards is also a typical practice if you are making your own baseboards and door trim in some cases. If you are trimming any boards, you may be concerned about keeping those trim pieces for a project in the future.
After all, what do you do with the pieces of wood that you trim off? I would use them for beautiful real wood veneer. The trim pieces are 1/4 inch thick.
Cutting the real wood veneer pieces
As I said my real wood veneer pieces are 1/4 inch thick as they were trimmed off for my board and batten wall project. If you are going to make these real wood veneer pieces from a regular 1 X 3 or 1 x 4 board. You will need to remember that in the US the actual measurements of these boards are .75 X 2.5 inches. Don’t ask why that is, I don’t know. It is something I have shaken my head at for years.
You have to take into account how much real wood veneer you are going to get from that board. If you are thinking you will get 3 trim pieces out of this wood that are 1/4 or .25 thick. You will not. There is a blade (table saw) thickness to take into account. A common size is .0625 thickness for your table saw blade.

This means if you want 3 strips of real wood veneer out of a 1 X 3 board. Your trim pieces or veneer would only be 0.1875 or 3/16th of an inch. There is a tool that I used in this project or the previous project when I trimmed the boards to get my measurements as close as I could to what I wanted in thickness.
Tools to make the real wood veneer
Measurement tool

Duplicator tool

What do you do with the extra small pieces of wood? I used them like veneer pieces. They are easy to trim out for the window because they are thin. You have to be careful on that point as well. They do split and break easily if you are not careful with your placement of trim nails/brads.
Trimming out the window with real wood veneer
These real wood veneer pieces are easy to trim out the window because they are thin. You have to be careful on that point as well. They do split and break easily if you are not careful with your placement of trim nails/brads.
Sealing the wood
I have not finished putting the hardware back on at this point because I still need to clear-coat the trim. I will be using Polycrylic Clear Matte Water-based Lacquer. The reason behind this is that I have been told it does not yellow as much as other clear coats. I have thought about also applying a light whitewash to the wood before a clear coat.
Real Wood Veneer
Real Wood Veneer can look beautiful and add variances in the wood tones to your project. Variances are subtle, but I believe it is beautiful. It reminds me of these other wood decor vases with variances in the wood.


One of these vases is nearly $500 and the other is $20.00. However one is 22 inches tall and the other is 7 inches tall which is a big difference. The point is the variation in the same tones of the wood is beautiful.
Trimming of the window in real wood veneer


Big picture of the real wood veneer on a small basement window. The arrow shows where I applied another piece of real wood veneer but it was harder to open the window with it. I took it off and will probably just finish painting in that area.
Left side of the window with the beautiful real wood veneer.
More pictures of the real wood veneer-trimmed window


Just shows a close-up of the thickness of the real wood veneer. This looks larger in the picture than it is.

This is a better picture of that trim with my cut marking on it. There will be another piece of real wood veneer placed or trimmed out or wrapped around these pieces. However, you can see the white trim board that is part of the original trim work on the window.

Hopefully, this will give you some ideas of what you can do with making your own beautiful real wood veneer.
(Yes, I already know I am not the greatest at taking pictures).
Discover more from Twilight Kaleidoscope
Subscribe to get the latest posts sent to your email.


