

The building blocks of improvement
You may think you are pampering yourself with an at-home facial. However, in reality, you are just taking care of your overall skin health. Perhaps even in a small part your mental state.
“At-home facials” have been around since the 1500s. They haven’t gone away. That means they still work. They may have improved in some areas. We aren’t using sharp dead sea salt or just milk on our face for the exfoliation benefits. I am grateful to all of these pioneers. We have learned from them. Scientific research has also helped with educating us on better methods and products for a better facial at home.
Improved At-home Facials
Improving your at-home facials can aid in better cell turnover, blood flow, and the release of congestion on the skin. Not to mention, glowing and more healthy-looking skin. This could potentially improve your mood as well. When we perceive ourselves to look our best, we thrive.
Just throwing a sheet mask on doesn’t have the same effect as an at home facial. Nothing wrong with a sheet mask they do have affects on the skin. But by adding some of these steps you should not only improve your facial experience. But improve your facial skin over time.
Skin health improvement
I would say a majority of people are looking to improve their skin health. Skin can look dull, run-down, or congested at any age. Everything shows on our skin. Which is why facials are important as we age, even in the teen years and the mature age. If your grandma or great grandma, friends, family want facials, it is a great activity to share.
Prepare your space and supplies
Gather your supplies. What are you going to use? You need two types of facial cleanser for the double cleanse. Get either a cleansing balm or cleansing oil. Then a gentle facial cleanser. Eye makeup remover to start along with washcloths, disposable towels or facial muslin cloth. Cotton balls and even cotton buds are useful to gather in your supplies.
Face masks
Gather your facial masks. Two is preferred for a quality facial. Yes, a sheet mask can count as one of your masks. However, if you want the spa experience, one mask should be an exfoliator and one nourishing mask. This may also depend on your skin and your skin needs.
Exfoliation mask


If you have a facial tool like a scrubber then get it ready. Make sure it is charged. If you are going to use a facial steamer get it ready. If your have a silicone mask it out as well.
Put on some soft, relaxing music. Then get your scents ready.
Scent and focus on you or your group
As a candle or scent isn’t necessary but it will improve your facial. Something about a scent you enjoy improves your mood. Or even an essential oil in a diffuser. Just that simple thing, can make it a great experience instead of a chore. Should probably go without saying that you need to be somewhat relaxed. There are times when you run around cleaning your house with a mask on your face. This is not one of those times. not running around cleaning your house while your masks are on your face. Taking time for yourself does pay off in recharging your batteries. So you have more for the others in your life. Took me a long time in my life to figure that out.
Cleansing with Massage
First, even when you are washing your face in your nightly routine, you should include some sort of facial massage. It is like when you wash a plate, does it come clean with just water splashed on it? Neither will your face. You need to massage the cleanser around your face for 30 seconds to 2 minutes. Dermatologists have stated that over 2 minutes with cleanser may do more harm than good to your skin barrier. Between 30 seconds to 2 minutes is the sweet spot to properly clean and help dislodge debris from your pores. The time frame isn’t any different when you are enjoying an at-home facial.
Massage, as a way of improving your at-home facial
Facial massage techniques
Skin health has been important since the first at-home facials. One of the techniques that has been around since the beginning is Massage. Massage is so vital for blood flow, relaxing tension, and removing dead skin cells.
Some basic massage techniques would be:
- using your index and middle finger press on your temples again with a circular massage.
- using circular motions with your fingertips and following the bone structure of your face.
- using those same fingers press underneath the eye sockets on the upper cheekbone on each side of your nose with the same motion. Slow movements and be gentle.
- Another simple move is to bend your index and middle fingers using the first two segments of your fingers to run along either side of your jawbones. Stopping and pressing at the end of your bone underneath your ears.
Be slow and gentle. Using a light to medium pressure. Complete a round of 10 of each move. Then pause and hold briefly. Then start again. Until you have completed at least 3 of each massage move.
Of course, these are simple massage moves and there will be a detailed post on facial massage.
Before doing the above massage you will need to cleanse your face.
Cleansing
When you go into a spa for a facial, they will cleanse your face again. Even if you came in bare faced and ready to go. do the same steps they would if your face has makeup all over it. You should do the same.
First step, eye make up remover. Yep, even if you think you got it all. Do it again.
Even if your face is clean when you go into a spa facial they will do the same steps they would if your face has makeup all over it. Except for those cotton balls with makeup remover on them. You should do the same. Use a cleansing balm, yes, you should get one of these balms. They remove makeup and sunscreen and they remove some of the oils on your face. Oils remove oils. (*tip they can also remove hair dye or eyebrow dye on your skin).
What steps should be in your facial to improve it?
An improved at-home facial should have cleansing (usually 2 types of products), exfoliation, extractions, product masks, and one or two humectants (gel, cream, or rich lotion). Add-ons would be steam, a sprayed scent in the air or a candle, a warm towel, and/or a facial tool.
Use a cleanser for your skin type. If you are a combination like I am, I usually use CeraVe Hydrating cleanser during the winter, but I am currently, using Inkey List Salicylic Cleanser. Don’t spend a lot on your cleansers, they just go down the sink. There are exceptions to that if you have breakouts or dull skin quite often and are over 25 years old. A terrific cleanser, for dull and blemish-prone skin, I would recommend that you check out is Dr. Dennis Gross’s AHA/BHA cleanser. It is amazing for all skin types. If I could find a similar product for less, I would post it. However, I just haven’t found anything comparable to the formula. It releases dead skin cells beautifully without stripping your face and seems to deep clean those pores.
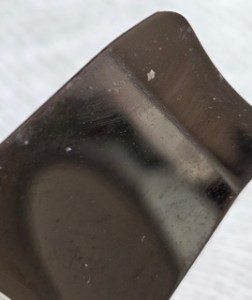
Skin Spatula or skin scrapper
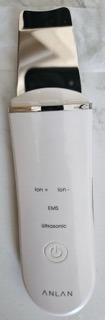
Now, on to the fun part. It is fun for me because I like to see the things that come out of my skin. A steamer, mister, or aloe is necessary for this step if you use, a skin spatula, scrapper, or scrubber (whatever you wish to call it). The reason is that this tool works like a power washer, they both need water to clean. It does go deep into the skin to remove debris.
Before you begin, you need to clean the blade with alcohol. I also sometimes put the blade in the route of the steam while I am using it for my facial, and then I wipe it on a lint-free towel to remove whatever the blade has gotten on it from my skin.
Extractions
You can also use this for extractions, there is a setting on most of these devices that pulses for this purpose. Put the skin scrubber on its side at an angle. Slowly and very gently, move it up to the pore that needs to be extracted. You can go in from multiple angles to get it out, but still very gently.
If you don’t have a tool or a steamer, you can use a hot towel. Some people just run a towel under very hot water. I have seen people put facial washcloths with some water in a slow cooker and take them out with tongs. I haven’t tried this method but I think I will as an experiment one day. If anyone has used this method, please comment and let me know. You can also put your face over a boiling pan of hot water with a towel behind your head to create that steam on your face.
Steam is not necessary, but heat is necessary in at-home facials. It is easier for nonprofessionals to extract from clogged pores with heat. YouTube has several videos on how to do extractions with your fingers and tissue. You can use that method as well. I like using the scrubber because it is just easier and has less risk of damaging the skin (if you don’t press too hard). All of these things will improve your at-home facial.
Exfoliation
This step will improve your at-home facial and give the next steps more opportunity to penetrate deeper into your skin. Some like to use a manual exfoliant, which is fine. However, there are quite a few exfoliants on the market that have particles that can damage your skin especially after it has been cleaned so thoroughly. Look at those carefully and use one that is gentle.
I use a chemical exfoliant. Again, Dr. Dennis Gross Peel Pads are an excellent choice. They just do a great job of exfoliating and refining skin tone. Furthermore, I put them all over my hands as well. Your cuticles will look great.
You can use a toner that contains an exfoliant or other peel pads that contain an exfoliant. I have used several of these other products and keep going back to Dr. Dennis Gross, even though they are pricey. What matters here is an exfoliant, The Ordinary has their red peel mask, which is a great one at a great price.
A home facial shows the improvement in plump, dewy skin
An at-home facial that improves the look and feel of your skin wouldn’t be complete without two masks. Yes, two masks. There are exceptions to that depending on the masks but as a general rule, two are the key. Sheet masks are a good step at this point. Choose ingredients that work best for your skin type or what you want to achieve. There are sheet masks in all price ranges and ingredients.
Silicone mask cover

I also have a silicone mask cover for my sheet mask which allows me to lay down and listen to music. Or stand up to get me a nice drink with a straw. Yes, I know I look ridiculous and I pull the mask out around my lips so I can put the mask up on my lips to give them some love as well. (That is a Charlotte Tilbury tip)

Drying Masks
You could use a clay or sulfur mask at this point if your concern is blemishes. I would mix a humectant in with these types of masks because, with the other cleansing, they could be too drying on your skin. A drop of glycerin, aloe vera gel, or jobaba oil would be good options. Facials that I have seen have told me not to let these masks dry on my skin before removing them. For one, they can be hard to remove and then you are tugging and pulling on your skin. Then they can also be more irritating to the skin at this point in the facial so by not letting them dry down all of the way, your skin retains its moisture barrier to some degree.
Hydration Mask
Jelly masks are a great option at this point as well. Apply a hydrating serum underneath the jelly mask to get a double hydrating and calming result. Honey masks are another great option because of the hydration, anti-bacterial effect, and extremely calming feel for the skin. Some other brands have some great hydration masks on the market in every price range as well. Cocokind, Shea Moisture, and Elf all make some hydrating masks.
You may want to spend more on this step and go for a Sonya Darker or Tatcha. Mainly for the luxury experience of this facial. Not that the ingredients are so much better (I haven’t compared all of the ingredients in those products). However, I do know that formulations, as a rule for more high-priced products, add more thickening and silky feeling ingredients to give you a more luxe, sensory feel on the skin. That isn’t a bad thing in a facial. We all love the feel of luxury on our skin. That alone may be the chef’s kiss to your at-home facial.
Schedule for At-home Facials
You should enjoy one of these improved facials every 4 to 8 weeks. Some facialists state that they should be done more frequently as you age and skin cells turn over less on their own.
At-home facials or spa facials can improve the look of your skin. At-home facials have been around since the 1500s for a reason and it isn’t because everyone had an abundance of nothing to do time. Something that has stood the test of time, no doubt it works.
No matter what products you use, I am positive that using these steps and concentrating on you will improve your at-home facial. You will love the look of your skin.


Leave a Reply